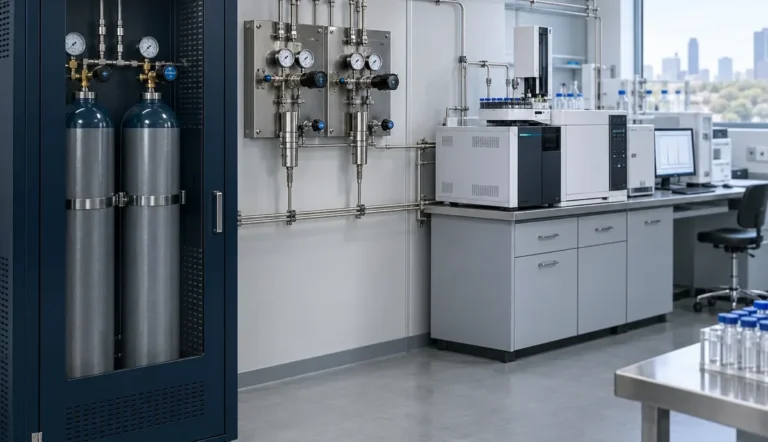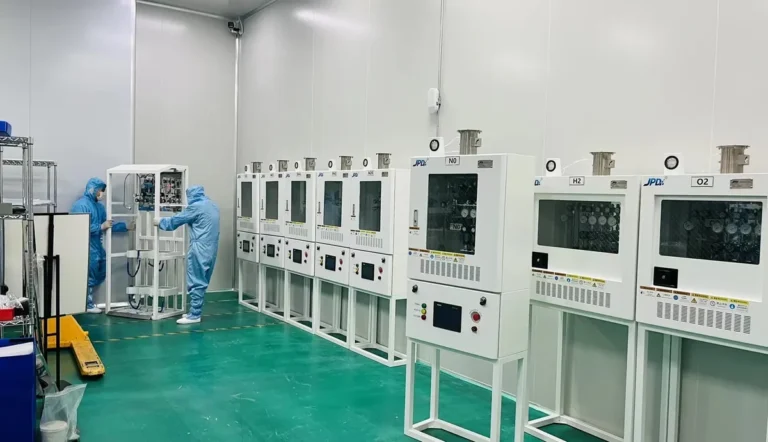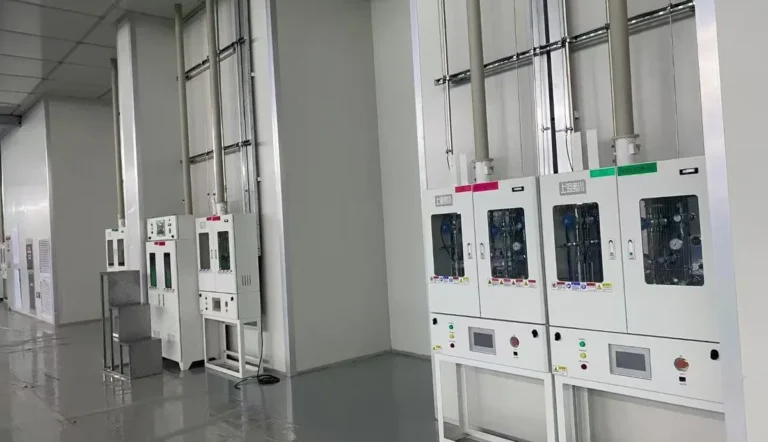

Quick answer: To select a laboratory gas delivery system, work through these steps in order:
- Write a gas schedule listing every gas, purity, pressure and flow at every point of use.
- Classify each gas by hazard and purity tier.
- Choose a supply source for each gas: bench cylinder, manifold, liquid container or generator.
- Choose a distribution layout and size the laboratory gas piping.
- Select point-of-use hardware: regulators, valves, turrets, burners and mixers.
- Add the safety layer: detection, shutoff, gas cabinets and laboratory gas scrubbers.
- Compare supplier proposals against the same requirements.
Skipping the gas schedule is the most common cause of undersized lines, wrong materials and costly rework.
What this guide adds: it is a decision workflow with selection tables and a worked sizing example, written for laboratory managers, designers and buyers. For an explanation of how a complete laboratory gas system works from source to outlet, read the laboratory gas delivery systems guide first.
Why should laboratory gas system selection follow a fixed sequence?
Each decision in a laboratory gas system depends on the one before it. Several examples show how:
- Purity sets the materials and valve types.
- Consumption sets the supply source.
- The supply source and room layout set the pipeline route.
- The route and flow set the pipe size and regulator staging.
- Hazard class sets the enclosures, detection and exhaust treatment.
When decisions are made out of order, the project often has to be reopened. A common case is choosing a manifold model before confirming peak flow, or ordering brass components before confirming that one instrument needs ultra-high purity.
A fixed sequence also makes the project easier to quote and approve. Designers, contractors and equipment suppliers can all work from the same documented requirements. Their proposals can then be compared on engineering quality rather than on different assumptions.
Step 1: How do you build a laboratory gas schedule?
A gas schedule is a table that lists all laboratory gases required at every point of use. It is the foundation document for any laboratory gas solution. For each outlet or instrument, record:
- the gas and the purity grade required by the instrument or method
- the required delivery pressure at the instrument inlet
- the average and peak flow
- the hours of use per day and whether use is continuous
- whether an interruption is acceptable
- the room and bench location
Add expected future instruments, because pipelines are expensive to change after walls and ceilings are closed.
| Point of use | Gas | Purity | Inlet pressure | Peak flow | Interruption allowed? |
|---|---|---|---|---|---|
| GC 1–3 (carrier) | Helium | 99.999% | 5–6 bar | 0.5 L/min each | No |
| GC 1–3 (FID fuel) | Hydrogen | 99.999% | 3–4 bar | 0.05 L/min each | No |
| ICP-MS | Argon | 99.996% | 6 bar | 20 L/min | No |
| Teaching bench burners | Fuel gas | Utility grade | Low pressure | Per burner rating | Yes |
The values above are an illustration. Always take pressure, purity and flow from the instrument manufacturer’s site preparation documents. Average consumption determines the supply method and the cylinder logistics, while peak simultaneous flow determines pipe sizing and regulator capacity.
Step 2: How should each gas be classified by hazard and purity?
Classifying every gas on the schedule by hazard and purity turns a list of gases into clear component requirements. Hazard classes include:
- inert and asphyxiant gases, such as nitrogen, argon, helium and carbon dioxide
- flammable gases, such as hydrogen, methane and acetylene
- oxidizers, such as oxygen and nitrous oxide
- toxic and corrosive gases, such as ammonia, chlorine and hydrogen chloride
Purity tiers range from utility and industrial grades to high-purity and ultra-high-purity (UHP) grades. UHP grades are typically 99.999% and above.
| Purity tier | Typical uses | Recommended wetted materials | Typical valve type |
|---|---|---|---|
| Utility / industrial | Burners, pneumatic tools, general purging | Copper or brass where compatible | Ball or needle valves |
| High purity (99.99–99.995%) | General instruments, cell culture CO₂, sample preparation | Brass or 316L stainless, clean-for-service | Needle or packless valves |
| Ultra-high purity (≥99.999%) | GC, GC-MS, ICP-MS, trace analysis, semiconductor research | 316L stainless, bright-annealed or electropolished tube, face-seal fittings | Diaphragm valves |
| Corrosive or toxic service | Etching, synthesis, specialty research | 316L stainless (EP), gas-specific alloys where required | Diaphragm valves with secondary containment |
The most cost-effective systems match each line to its tier, rather than upgrading every line to UHP or downgrading every line to utility grade. Detailed valve criteria are in the laboratory gas valve buying guide, and tube and fitting selection is covered in how to choose laboratory gas piping and fittings.
Step 3: Which supply source fits each laboratory gas?
The supply source should be chosen gas by gas, based on consumption, purity, hazard and the need for uninterrupted supply. The main options are:
- cylinders at the bench
- a centralized laboratory gas manifold system with automatic changeover
- liquid cylinders (dewars) or bulk tanks for high-consumption gases such as argon and nitrogen
- on-site gas generators for nitrogen, hydrogen or zero air
| Supply source | Best fit | Strengths | Limitations |
|---|---|---|---|
| Cylinder at bench | One or two instruments, low consumption, temporary setups | Lowest capital cost, simple | Cylinder handling in the lab; interruptions at changeover; limited for hazardous gases |
| Central manifold with changeover | Several instruments, gases needed continuously | Continuous supply, cylinders outside the lab, centralized monitoring | Piping and installation cost; requires a source room or enclosure |
| Liquid cylinder or bulk tank | High consumption of argon, nitrogen or CO₂ | One liquid cylinder can hold the volume of many high-pressure cylinders; fewer deliveries | Boil-off loss at low use; space and handling requirements |
| On-site generator | Nitrogen, hydrogen or zero air with steady demand | No deliveries; low stored gas volume improves safety | Capital cost, maintenance, power dependency; purity limits for some applications |
A practical rule for manifold capacity is that the primary bank should cover at least an average week’s consumption, with an equal reserve bank. The trade-offs between local and central supply are compared in centralized vs cylinder-at-bench gas supply. Manifold types and changeover modes are explained in laboratory gas manifolds: the complete guide.
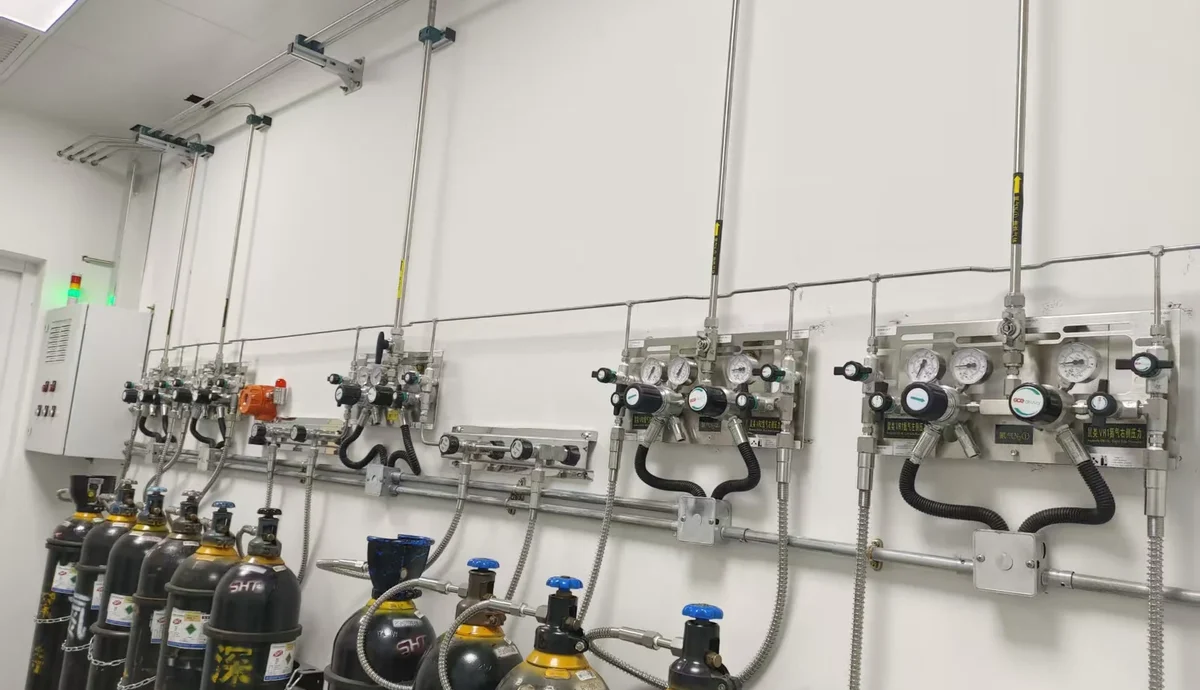
Step 4: Which distribution layout should the laboratory gas pipeline system use?
The distribution layout determines how gas reaches each room and bench, and how easily the laboratory gas distribution system can be isolated, maintained and expanded. Most systems use one of three layouts:
- Dedicated line: One line from source to instrument. Best for UHP or hazardous gases serving a single critical instrument.
- Branched trunk: A main line with branches to rooms and benches. The common choice for shared gases.
- Zoned layout: Isolation valves and secondary regulators for each room or lab. Lets each zone be maintained or modified without shutting down the building.
Two-stage pressure regulation is widely used in centralized systems. The source regulator sets a stable line pressure. A point-of-use regulator at the bench then sets the exact pressure for each instrument and isolates it from pressure changes caused by other users. Each lab or zone should have a clearly labelled isolation valve and a pressure gauge at its entry. The pipeline should be labelled with the gas name and flow direction at regular intervals. Design services for this stage are described under laboratory gas piping design.
Step 5: How should laboratory gas piping be sized?
Laboratory gas piping is sized for the peak simultaneous flow at the required pressure, with an allowance for growth. Several rules of thumb are widely used:
- Set the line pressure at the highest point-of-use requirement plus at least 20%, or plus about 1.7 bar (25 psig), whichever is greater.
- Limit the pressure drop from the source to the furthest outlet to about 10% of the line pressure.
- Add a 20–50% capacity allowance for future instruments.
- Apply a realistic diversity factor, because not all outlets draw peak flow at the same time.
Over-estimating diversity increases cost. Under-estimating it causes pressure drops at busy times.
Worked example: An analytical lab has three GCs, each needing helium at 5–6 bar and 0.5 L/min. One future GC is planned.
- Peak flow: With no diversity (all GCs can run at once), peak flow is 4 × 0.5 = 2 L/min.
- Line pressure: The highest requirement is 6 bar. Adding 20% gives 7.2 bar, and adding 1.7 bar gives 7.7 bar. The greater value applies, so the line is set at about 7.7 to 8 bar.
- Allowed pressure drop: About 10% of 8 bar, or 0.8 bar, to the furthest GC.
- Tube size: At these low flows, the drop over a typical laboratory run is small for common 1/4-inch or 6 mm UHP tube. Very long runs or high-flow gases such as ICP argon need a calculated check and often larger tube.
High-flow gases change the result. One ICP-MS drawing 20 L/min of argon can need a larger line than several GCs combined.
Step 6: Which point-of-use hardware should be selected?
Point-of-use hardware is the part of the laboratory gas system that users touch every day, so it must suit both the gas and the task. The main options are:
- Point-of-use regulator panels: Wall- or bench-mounted panels with a regulator, gauge, isolation valve and sometimes a filter or check valve. They are the standard connection for analytical instruments.
- Laboratory gas turrets: Bench-mounted outlet fittings, single or multiple, that supply utility gases such as fuel gas, compressed air, vacuum or nitrogen. Each outlet has a colour-coded handle or label. Turrets suit teaching, biology and general chemistry benches, where many users need simple, robust outlets.
- Laboratory gas burners: Burners are supplied from a fuel gas turret. Teaching and microbiology labs should consider burners or turrets with flame-failure protection, which shuts off gas if the flame goes out. Combined with a room-level emergency shutoff, this reduces the risk of unburned gas release.
- Laboratory gas mixers: Mixers blend two or more gases to a set ratio. Examples are CO₂/air or O₂/N₂ mixtures for cell culture incubators and hypoxia studies, or calibration mixtures. Mass-flow-controller mixers give the most stable ratios, while simpler proportional mixers suit less critical uses.
- Laboratory gas valves at the outlet: Needle valves are used for fine flow control, ball valves for quick on-off isolation, and diaphragm valves for UHP or hazardous lines.
| User need | Recommended point-of-use hardware | Key selection check |
|---|---|---|
| Analytical instrument (GC, ICP-MS, LC-MS) | Point-of-use regulator panel with diaphragm or packless valves | Outlet pressure range, purity tier, filter and check valve |
| Teaching or general chemistry bench | Laboratory gas turret with multiple outlets | Gas identification, robust handles, mounting style |
| Flame work in biology or teaching labs | Fuel gas turret with laboratory gas burner, flame-failure protection | Fuel gas type, shutoff interlock, ventilation |
| Incubators and controlled atmospheres | Laboratory gas mixer | Mixing accuracy, flow range, alarm on gas loss |
| Fume hood services | Remote-controlled hood fittings | Control outside the hood sash, gas labelling |
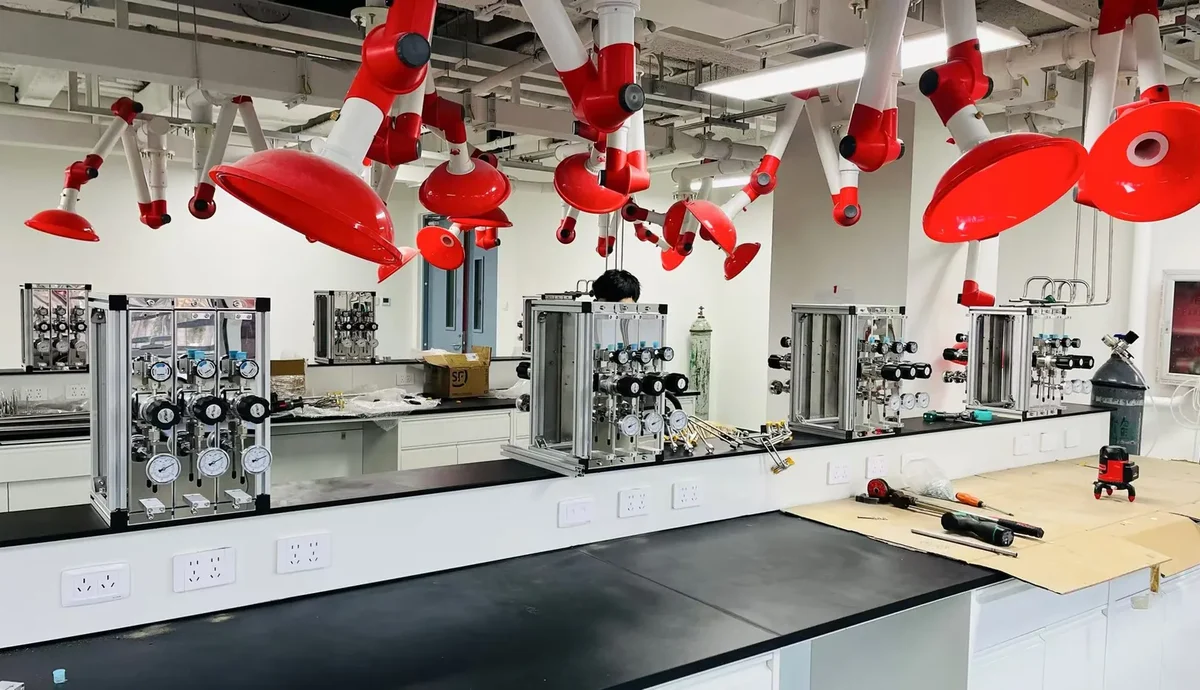
Step 7: Which safety components does the laboratory gas system need?
The safety layer is chosen by gas hazard class, the quantity stored and local codes such as NFPA 55 or their national equivalents. Typical selections by hazard class are:
- Inert and asphyxiant gases: Oxygen-depletion monitors in rooms where a leak could reduce oxygen levels, plus pressure relief on lines.
- Flammable gases: Flammable gas detection, check valves and flashback arrestors at sources and points of use, automatic shutoff valves, and separation from oxidizers.
- Oxidizers: Oxygen-clean components, compatible lubricants, and separation from flammable gases.
- Toxic and corrosive gases: Exhausted gas cabinets, gas detection linked to automatic shutoff, coaxial or double-containment tubing in occupied areas, purge panels, and a laboratory gas scrubber to treat vented gas before discharge.
Hazardous specialty gases are normally supplied from exhausted cabinets. Selection of these enclosures is covered in laboratory specialty gas cabinets explained.
Choose a laboratory gas scrubber according to the gas and the vent flow:
| Scrubber type | Principle | Typical use |
|---|---|---|
| Wet scrubber | Absorbs water-soluble gases in a liquid | Acid and alkaline gases such as HCl and NH₃ |
| Dry adsorption scrubber | Captures gases on a chemical adsorbent bed | Low-flow toxic or corrosive vents; simple maintenance |
| Thermal or electrically heated scrubber | Oxidizes or decomposes gases at high temperature | Flammable and pyrophoric gases such as silane |
| Plasma wet scrubber | Plasma decomposition followed by wet treatment | Hard-to-treat gases such as perfluorinated compounds |
LGF’s laboratory gas scrubber range and the exhaust treatment and purge solution show how these units connect to cabinets and vent lines.
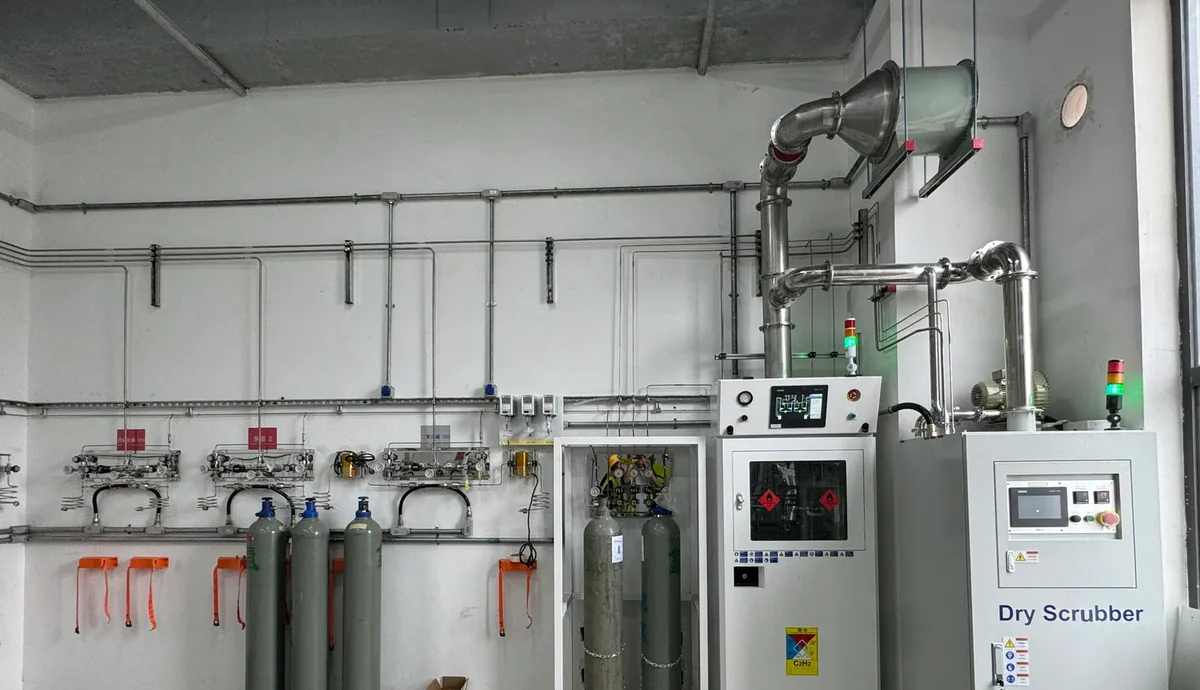
Step 8: What monitoring and controls should be specified?
Monitoring turns a laboratory gas system into a managed utility, rather than one that is only noticed when a cylinder runs empty. Specify:
- low-pressure and changeover alarms on every manifold, with local and remote indication
- pressure transmitters on critical lines
- gas detectors with alarm levels matched to the gas
- emergency shutoff buttons at lab exits for flammable and toxic gases
- signals to the building management system
Alarms should go to people who can act on them, such as the lab manager, facilities team or security, not just to a local beacon.
Controls also support cost management. Line pressure and cylinder-change logs show real consumption, help optimise delivery schedules, and reveal leaks through unexplained pressure decay over nights and weekends. Equipment for this layer is listed under gas monitoring and safety systems.
Step 9: How should supplier proposals for a laboratory gas solution be compared?
Proposals can only be compared fairly when every supplier quotes against the same gas schedule, hazard classification and layout. Score each proposal on the criteria below, and ask for clarification wherever a supplier has changed an assumption.
| Criterion | What to check | Suggested weight |
|---|---|---|
| Engineering compliance | Meets the gas schedule, purity tiers, pressures and codes | 25% |
| Component quality | Materials, valve types, leak integrity (for example helium leak tested), traceability | 20% |
| Safety scope | Detection, shutoff, cabinets, scrubbers and alarms included as required | 20% |
| Installation and testing | Welding or fitting method, pressure and leak tests, purge and purity verification, documents | 15% |
| Lifecycle cost | Gas logistics, maintenance, spare parts, energy for generators or exhaust | 10% |
| Support | Training, response time, annual inspection service | 10% |
A clear request for quotation makes this comparison possible. The laboratory gas product selection guide lists the inputs suppliers need, and the installation guidelines describe the testing that should be included in scope.
How do selection priorities differ between laboratory types?
The same workflow applies to every laboratory, but the priorities change with the application:
- Analytical and testing laboratories: Focus on UHP carrier and detector gases, uninterrupted supply and low contamination. Diaphragm valves and electropolished tubing are standard.
- University and teaching laboratories: Need many simple outlets, laboratory gas turrets, burners with flame-failure protection, clear labelling and room-level emergency shutoff.
- Biopharmaceutical and life-science laboratories: Prioritise CO₂ and mixed gases for incubators, laboratory gas mixers and continuous monitoring.
- Semiconductor, materials and energy research: Use toxic, corrosive and pyrophoric gases, so they depend on gas cabinets, valve manifold boxes, purge systems and scrubbers.
Examples are shown in the university and research laboratory, biopharmaceutical laboratory and independent testing laboratory application pages.
What are the most common mistakes in selecting laboratory gas systems?
Most selection errors come from incomplete information at the start of the project. The mistakes that appear most often are:
- Brand-first selection: Choosing equipment by brand or price before the gas schedule is complete.
- Average-flow sizing: Sizing piping for average flow instead of peak simultaneous flow.
- One material everywhere: Using the same material and valve type for every gas regardless of purity or hazard.
- No growth allowance: Leaving no capacity for future instruments.
- Purge and vent left out: Omitting purge and vent lines for hazardous gases.
- Exhaust treatment left out: Forgetting exhaust treatment until the permit stage.
- Ignoring gas logistics: Not planning for cylinder deliveries, which affects the source room location.
Each of these is far cheaper to correct on paper than after installation.
Frequently asked questions
What is the first step in selecting a laboratory gas delivery system?
The first step is a gas schedule that lists every gas, purity, pressure, peak flow and location. Every later decision, including supply source, piping, valves and safety equipment, depends on this document.
When should a laboratory switch from bench cylinders to a central manifold?
A central manifold becomes worthwhile when several instruments use the same gas, when supply interruptions affect results or schedules, or when cylinder handling inside the laboratory creates safety or space problems.
Do all laboratory gas lines need stainless steel?
No. Stainless steel 316L is the standard for UHP, corrosive and toxic gases. Utility gases such as fuel gas, compressed air or general nitrogen can often use copper or brass where compatible and permitted by local codes.
Is a laboratory gas turret suitable for analytical instruments?
Turrets are designed for general utility gases at the bench. Analytical instruments that need precise pressure and high purity are normally connected through a dedicated point-of-use regulator panel instead.
When is a laboratory gas scrubber required?
A scrubber is required when toxic, corrosive or other hazardous gases are vented from cabinets, purge panels or processes. Local environmental rules decide the exact requirement, and the gas chemistry decides the scrubber type.
Plan your laboratory gas delivery system with LGF
LGF Lab Gas Flow supplies the complete laboratory gas delivery chain for research, testing and analytical facilities. The range covers the source, distribution, point of use and safety layer:
- laboratory gas manifold and changeover systems
- specialty gas cabinets
- UHP regulators
- laboratory gas valves and fittings
- stainless steel laboratory gas piping
- point-of-use systems
- gas monitoring
- laboratory gas scrubbers
Because one team covers the whole gas path, the gas schedule, pipeline design and safety interfaces can be reviewed together, with no gaps between separate vendors.
Laboratory owners, designers, contractors and distributors can send a gas schedule (or an instrument list), room drawings, purity and pressure needs, hazard information and the project location. The LGF team will propose a matched configuration covering supply, distribution, point-of-use hardware and safety equipment, with a detailed quotation. Contact LGF to start your laboratory gas system selection, or explore centralized laboratory gas supply solutions.